7. Map Design with Print Composer
This exercise will show you the basic map layout capabilities of QGIS. It will
simply show how to use the provided tools. Designing maps requires a series of
review and evaluation of the map message, intended readers and a balance of
applying cartographic rules and violating them! Any state-of-the-art GIS
application cannot compensate for a good map design.
It is assumed that you have prepared the data layer symbology in main QGIS
application before using the print composer.
Before we begin, a list of commonly used pieces of a map layout is explained
succinctly by Krygier and Wood’s Making Maps book.
Elements of a typical map layout

- 1. Title - map titles vary, but should attempt to include the what, where
and when of the map. Type size should be 2 or 3 times the size of the map type
itself. A subtitle, in smaller type, is appropriate for longer or more complex
map subjects.
- 2. Legend - this is the key to interpreting the map. If it fails, your
goals for the map will fail. However, don’t insult your map’s readers by
including obvious symbols in the legend.
- 3. Scale - large- and medium-scale maps should include a scale indicator,
particularly if readers need to make measurements in the map. If your map’s
users want to reduce or increase the size of the map the visual scale is the
best option (it will remain accurate even if scaled). Small-scale maps (of the
entire earth or substantial portion of it) should not include a simple visual
scale because such maps contain substantial scale variations.
- 4. Explanatory text - you may not be able to express everything you need
your map’s readers to understand with the map itself. Use text blocks on the
map to communicate information about the map content, its broader context, and
your goals. Explain your interpretations of your map’s patterns with text: tell
your map’s readers (in addition to showing them with the map) what you think
about the mapped data. Readers may agree or disagree with your interpretation,
but your interpretation and intent will be clearly communicated.
- 5. Directional indicator - only needed if: 1) the map is not oriented to
the north; 2) the map is of an area unfamiliar to your intended audience.
Directional indicators can often be left off the map. If included, avoid large
and complex directional indicators: they are relatively unimportant and should
not be visually prominent.
- 6. Sources, credits - each map should include: data source(s), map maker
and date when it was made, map projection and coordinate system information.
- 7. Border - a border drawn around the map, title, legend scale, and
directional indicator to put together your map. If you add a border, make it
narrow, preferably in grey: so that it won’t be too noticeable. Or, a border
may not be necessary.
7.1. Print Composer Interface
To open the Print Composer, select
 New Print Composer.

Opening the Print Composer provides you with a blank canvass. The
components of the map composer are explained below:
- 1. Menu and Toolbar - all tools for adding and arranging map elements,
map navigation, export options.
- 2. Map Canvass - where you compose your map.
- 3. Composition and Item Properties tabs and Command history window -
where you customize various rendering option for your map elements. The
Composition tab allows you to set paper size, orientation, output
file resolution and other printing options. The Item Properties tab
displays properties for the selected map element. Click
 Select/Move item to activate options of the element in the
Item Properties tab.
Select/Move item to activate options of the element in the
Item Properties tab.
7.4. Adding a Scale Bar
Click the  Add Scalebar for the scale bar.

Scalebar options allow you to specify segment size, bar units,
style, height and width, scale bar units, font and other options.
7.5. Title and other text boxes
Click the  Add Label for various elements. You
can specify font type, size and colors. Use this tool for adding title and other
explanatory text.
Add Label for various elements. You
can specify font type, size and colors. Use this tool for adding title and other
explanatory text.
7.7. Exporting your final map
The options for importing your maps are:
- export to image or SVG - this is useful if you want your maps embedded in
other documents;
- print directly to a printer and;
- export as pdf.
To export your map to PDF, click the  Export as PDF
button and provide a filename in the dialog.
Export as PDF
button and provide a filename in the dialog.
 Add Map
from toolbar and drag a rectangle on the map canvas with the left mouse
button to add the map.
Add Map
from toolbar and drag a rectangle on the map canvas with the left mouse
button to add the map.


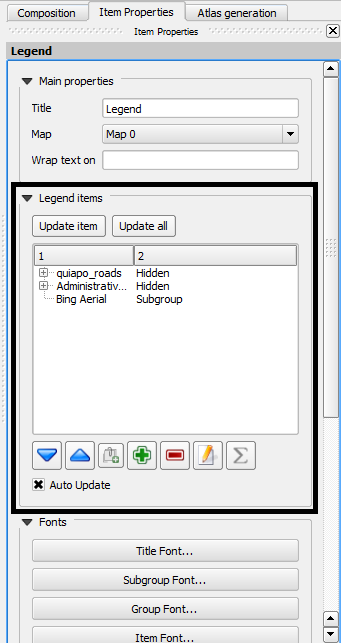
 Add Legend for the legend.

 adding basic shape (useful for borders and frames);
 element render ordering (raise or lower element draw order);
 aligning several elements;
 grouping and
  ungrouping elements and;
 adding external images (useful for adding logos and photos).